Friday, August 31, 2012

I'm feeling wishy WASHI!

Good morning friends! After what seems like a long break from blogging and creating I want to share this design I have created with my stash of washi tape.


I created this washi tape background for my design by layering the coordinating tapes horizontally on the cardstock. I left a tiny bit of white between each tape to allow for a visual break.


I also tore the edges, rather than using scissors to cut them, as this adds a bit of texture to the design.
Have you created a washi background? I hope you'll give it a try!

Until next time, keep doing what you love.


Monday, August 27, 2012

Thanks for hanging in there with me!

Good Morning friends! If you check in with me regularly you'll notice it has been a long time since I have had a chance to blog or even be very creative. My Dad hasn't been very well and has been in and out of the hospital throughout August. After a serious stomach issue he fell and broke his leg in two pieces. Poor guy has a hard time getting around and we continue have some serious rehab issues to contend with. I appreciate all your good thoughts and that you keep checking back for inspiration. 

I also wanted to share a few photos of my dolly decorating her Papa's toes and cast.

Until next time, keep doing what you love,

Friday, August 17, 2012

The Perfect Pick with Momenta and Clearsnap Blog Hop


Good morning friends! Welcome to the Clearsnap and Momenta Blog Hop. You should have come to me from the very talented Denise Hahn. Today, I am thrilled to share with you a design I made using Momenta and Clearsnap products.

Last fall my dolly and I went to the pumpkin patch to find just the right pumpkins for our porch. Ever since she was a little girl I have taken the camera along to catch the fun we have during the process. This year, though she is nine and I sadly admit that she is fast losing the excitement in racing up and down the row finding the pumpkins and loading them into our wagon. Sad, yes? But she still let me take a few pictures. This photo was snapped in between the ones with rolled eyes and fake smiles (some real ones thrown in there too).


I began with a grey Momenta background and misted some Opaque white on for dimension. I sewed a large circle in contrasting threads to provide the anchor for my leaves and title. I also matted the photo and added some pennant shapes. I used the Mudslide ink and inked the edges of all the leaves and paper pieces.


The designner adhesives and foils were very cool! I admit to being a little intimidated but they are so easy to use and create a distressed vintage feel. I cut and used the adhesives for anchor points along the upper right and along the left of the photos near the pennants.


The letters though, are my favourites. I used the Silhouette to create a large chunky font and ran it through my Xyron sticker maker upside down. Then I added the foils and inked over top with the Mudslide dye ink.


After I had fussy cut all the leaves and adhered everything to the page I inked the outside edge of the background and added a few bits of twine and buttons.


I loved this design and I will definitely be using these foils again. There are so many ways to create wonderful artistic effects on your pages and cards.


Please stop by the Clearsnap and Momenta blogs to see all the other creations my fellow designers have created. You could a $30 prize pack from both manufacturers! Deadline to leave a comment to win is 11:59pm (ET), Sunday 8/19.

Winners of the fabulous Clearsnap prize (shown) will be announced on our blog Monday, 8/20.


Here's the blog hop order..you should be off to Suzanne Austin next!


You'll be amazed and inspired to create your own great projects!

Until next time, keep doing what you love.
Christa


Momenta Supplies
PA-2331 Premium 12x12 Paper Pad
PA-0925 12x12 Paper Pad
PA-2383 Kaleidoscope 12x12 Pyramid Pad

Clearsnap Supplies
Design Adhesives "Let's Party"
Designer Foils in Irish Eyes and Lucky Penny
Dye Ink in Mudslide

Other Supplies
Misc. Buttons
Misc Thread and Twine
Silohuette Fonts are LD This and That & SNF Lollihop
Studio Calico Mr. Huey Mist in Opaque White
Xyron Sticker Maker
Xyron Mega Runner
Beacon's 3-in-1 liquid adhesive

Wednesday, August 15, 2012

Inspiration Elevator Challenge #4: Imperfectly Perfect

You may recall from last month's challenge that the purpose of this challenge group was to take our scrapbooking to the next level, to stretch our creative process and to grow as artists by embracing challenges that make us think, work and grow. 


This month our challenger was the very talented Lisa Moen.  Lisa, like most of us, doesn't always take the "perfect" photos. In fact, sometimes, the imperfect is all you have to tell your story. This month Lisa challenged us to use those imperfect photos to tell an story. Here's what she had to say about her challenge:

"I was digging through some old 1980's photos the other day and realized how bad some of the pictures were. Cameras have come a LONG way since then!

I have lots of pictures I haven't scrapped because they were/are poor quality pictures and I am sure you have pictures like that too. So let's dig out those blurry, bad pictures and tell the story behind them!  So my challenge to you this month is to use a bad photo and journal about it."

I must admit that I don't usually keep or print poor photos! Thanks to digital cameras and a huge PURGE a few years ago, I live in a happy, good, photo world. Finding a BAD photo was the first challenge I faced! Luckily I was able to find a photo a friend took when Adriane was only 4. I had blown the photo up to 5x7 and the quality turned out terribly. I couldn't bear to part with it though because her smile is so serene. Once I had my photo I was on a roll.

I began with white card stock and added water colour paint by drizzling it along the top of the page. I dried each colour in between with my heat tool. This prevented the colours from being muddied.


I also added a banner and used little bits from my "BIN OF NO RETURN" to embellish it.

Finally, I added some popped up clouds, and stitching for texture and dimension.


In the end, I loved how this photo made me feel. In fact, in thinking of when this photo was taken and how she has changed, I actually shed a tear.

 
Silly, I know. But thanks to Lisa's challenge I scrapped a photo that should evoke those memories for a long time to come. Thanks, Lisa! I hope you will stop by and see what the other designers on this adventure have created:


I invite you to play along with any of our challenges and add your comment below with a link, we would love to see what you have created..

Until next time, keep doing what you love to do.
Christa

Friday, August 10, 2012

It's a Blast

Good Morning friends! Thank you for stopping by. Please leave me a comment at this link and be entered to win a prize from me as I celebrate my new blog look and my new milestone of 20,000 views. Thanks everyone for your support and ind commenting over the past two years!

I also want to share with you my newest design based on the colour challenge at Authentique paper blog.

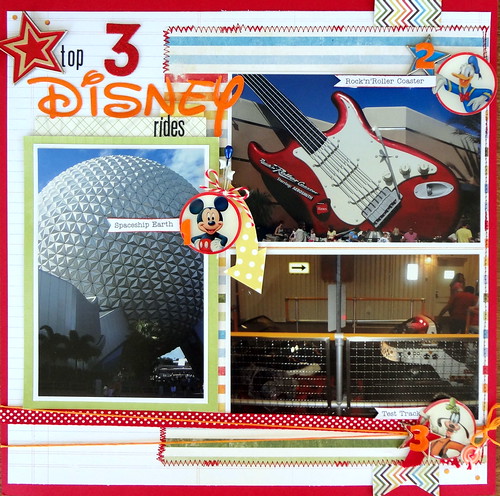
I used Authentique's Lively collection to create this layout for my Disney Album. Please forgive the quality of the photo; it is the fireworks that I wanted to capture and the colours in the castle. Disney is truly my favourite place on earth!
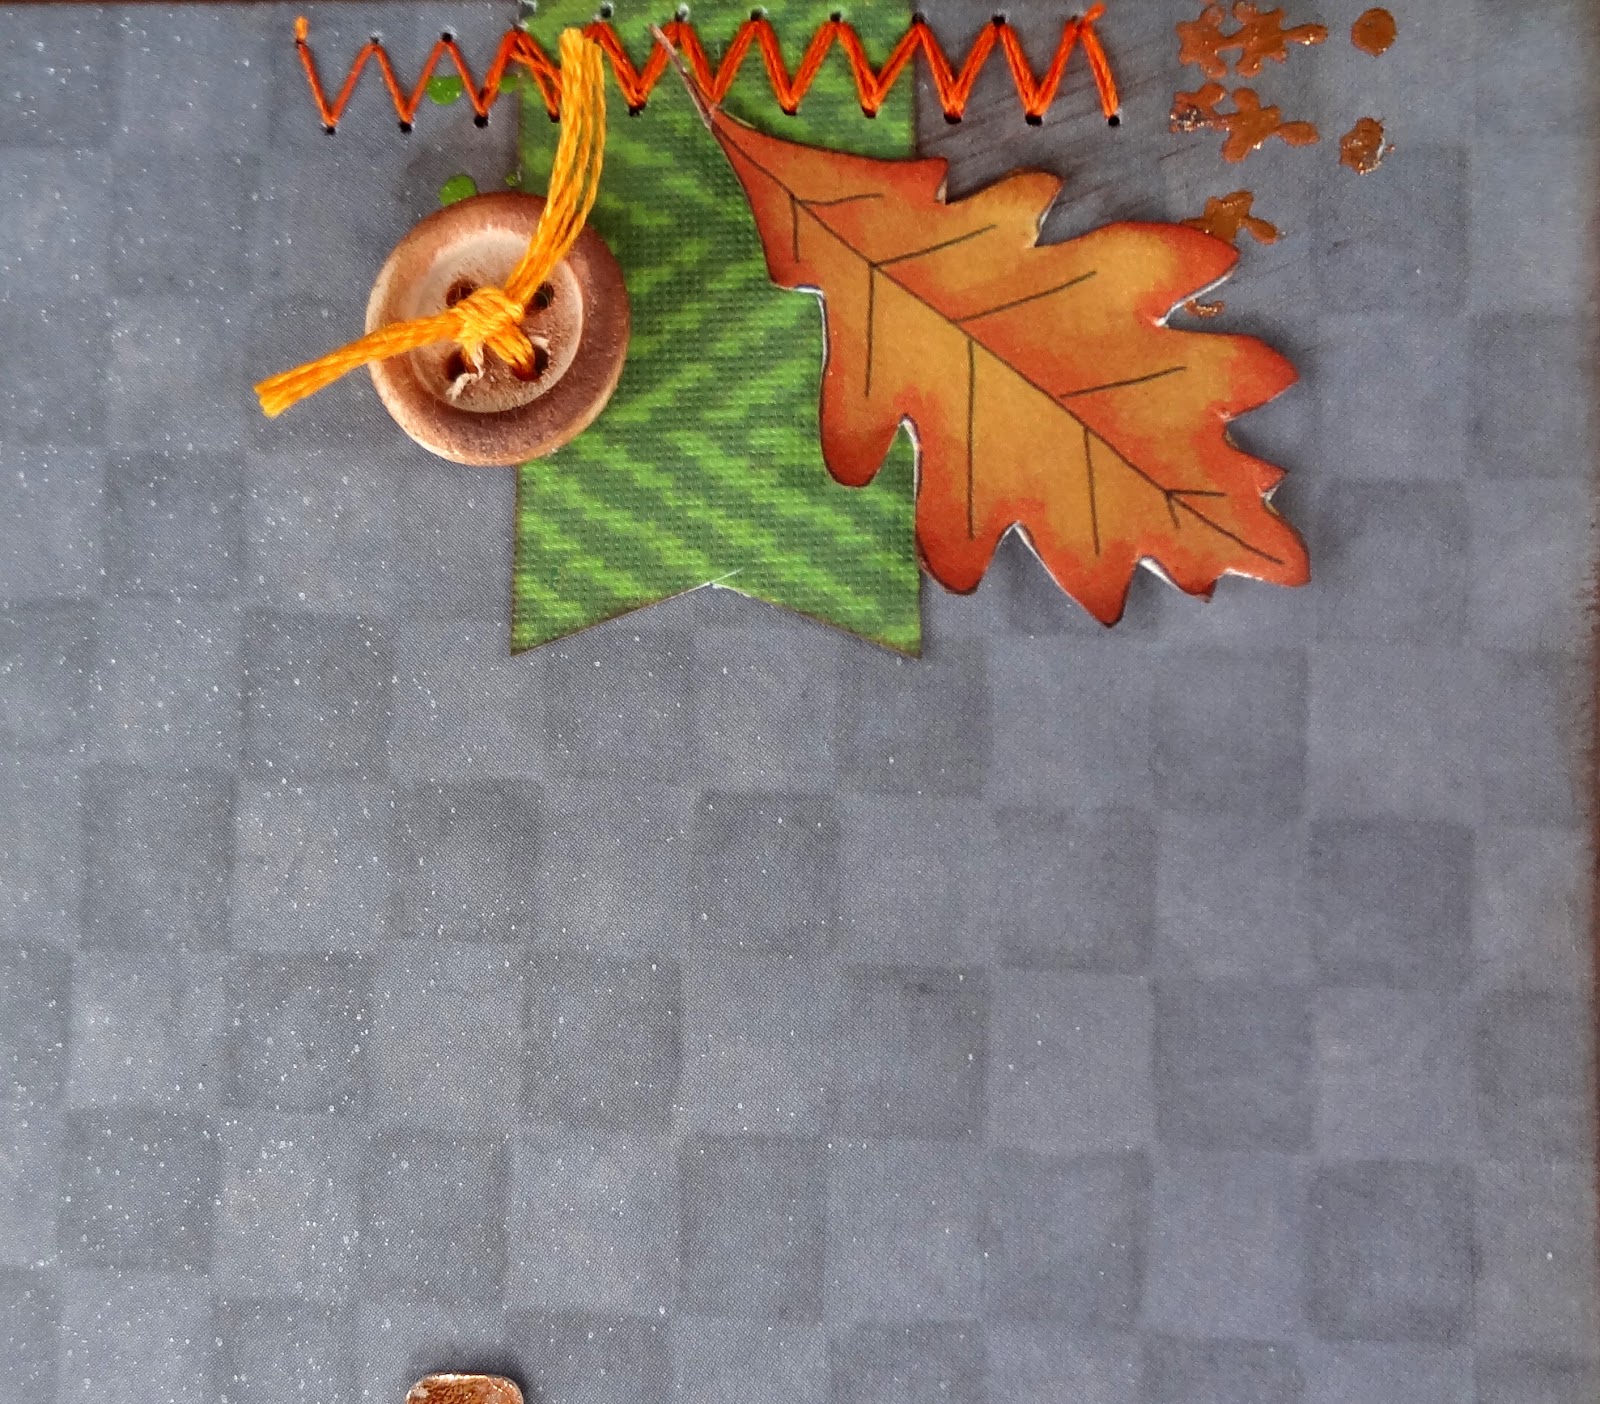
I began creating this design by adding chocolate brown acrylic paint around the outside edges of my background paper. I used a cristle brush and mixed a bit of water into the paint to dilute it i a bit for easier application.

I then added a template (Balzer) and water colour paints to match Lively's palette. Don't you think this mimics the fireworks?
I also inked the edges of the patterned papers and little tags. I wanted to further mimic the fireworks array and ran a circle of brown through my swirly embossing template. I then sanded the embossing. I like how the dark brown anchors the focal photo.  My title is cut from the Authentique collection using my Silhouette,
 I added some final touches with stitching, journalling and a little button cluster with pins.Can you see that litle bit of canvas tape? I used it the anchor my button cluster and cut it into a pennant shape.

I loved the colours in the new collection from Authentique. With their usual high quality and great patterns, it is a pleasure to use and create. I hope you will play along with this month's challenge too.
Until next time, keep doing what you love.
Christa

Supplies
Authentique Lively Collection
Spirited
Flutter
Vibrant Bright
Chipper 
Vivacious 
Details
Misc. Paint, Buttons, twine, pins and thread
Balzer template
Prima Canvas Tape

Thursday, August 9, 2012

Celebrate With Me!


Have you noticed anything new and wonderful about my blog? Kristine Davidson has created this sunny rainbow-y blog of goodness just for me! And not only is the design a perfect custom made fit, it was very reasonable for such an amazing work of art!

I hope you will go to her blog and check out her gorgeous portfolio and tell her how much you loved my new look.

In addition to my new blog look, I am celebrating a 20,000 views milestone. Where has the time gone? I am thrilled to be able to share my creativity and that you are interested in sharing this journey with me.

So, if you are a follower or become a follower, you could be entered to win a lovely prize from me. Just leave me a comment and say you are a follower and I will randomly choose a entry from all the entries. That's it. Celebrate my new look and be entered to win. (this is open to international friends as well!)

Thanks to Kristine and to all those of you who visit, say hello and leave comments I am truly blessed in having you as part of my crafty adventure!

Until next time, keep doing what you love.
Christa

Crazy Eights

Good Morning Momenta fans! I am excited to share with you a quick way to add some glitter to your pages. This crazy tie died number 8 was a perfect addition to daughter's 8th birthday layout.

Here's what you will need to begin:
A few bottle of glitter, a die cut number 8 and a bottle of Crystal Effects or Glossy Accents.

Step 1: cover the number 8 with Crystal Effects.


Step 2: Once it's completely covered add the glitter in a gradual amounts.
 Step 3: Once the die cut is covered in glitter. Let it stand to dry over night.

Then add it to your layout or card for that sparkly WOW factor!


I love this tie dyed effect and who doesn't love sparkle? Until next time, keep doing what you love,

Supplies
Momenta Birthday Wishes12x12  metal pad (PA-1783)
Momenta Bright Letter Stickers (ST-2557)
#8 Die Cut by Silhouette Fat Jack Font
Border cut by Silhouette
Misc. Buttons and clips

Monday, August 6, 2012

Happy Anniversary Practical Scrappers & more Olympic Fun


Congratulations to Practical Scrappers on three great years of inspiration! To honour them I created this layout about my Top Three Disney Rides.

I also used this design as the basis for my second Olympic Challenge issued today at Two Scrapbook Friends.

My idea is that The Olympics are all about placing in the top three: First, Second and Third place.
My challenge is to scrapbook your top three... top three movies, kids, husbands, places to eat out, vacations, drinks... you make it your own winning combination!

I hope you stop by Practical Scrappers and wish them a Happy Anniversary and Two Scrapbook Friends Forum to play along with our challenges. There are lots of prizes to be won!
Until next time, keep doing what you love.
Christa

Sunday, August 5, 2012

Under Construction


You might be wondering what's up with my blog and I am excited to announce that Kristine Davidson is working on a new blog design for Do What You Love Blog. She is working on a design that better reflects my crafty personality. I chose a great digital paper pack by Kristin Cronin-Barrow.

I can hardly wait to see it and hear what you all think. Thanks to Kristine for working on this design on her long weekend!

I hope you are enjoying your weekend! Until next time, keep doing what you love.
Christa